
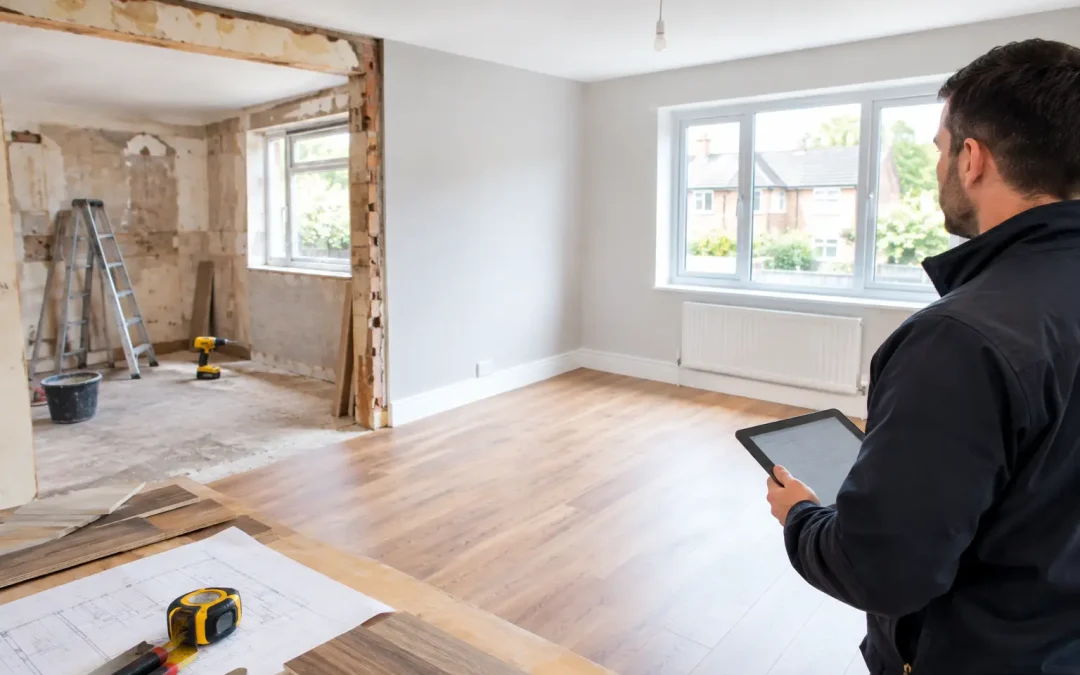
A vacant rental property can lose money every day it sits empty, but rushing work without a clear plan often creates a second round of repairs after new tenants move in. This void refurbishment project example shows how an organised, multi-trade approach can prepare a property for reletting while keeping the landlord or letting agent informed at each stage.
The example is representative rather than a fixed template. Every property has different wear, previous repair quality, budget priorities and letting deadlines. The aim is not to replace every item that looks dated. It is to identify the work that protects the property, improves presentation and reduces avoidable maintenance once the tenancy begins.
Void refurbishment project example: a typical two-bedroom house
A landlord regains possession of a two-bedroom terraced house after a long tenancy. The property is structurally sound, but it needs more than a quick clean before it can be marketed. There are scuffed walls throughout, loose kitchen cupboard hinges, damaged silicone around the bath, a leaking toilet fill valve, worn flooring in the hallway and a rear fence panel that has deteriorated.
There is also a small patch of staining below an upstairs radiator. Although the radiator is still warm, the cause needs investigating before decorating begins. Painting over a stain may improve the appearance for a short time, but it does not solve a leak or prevent further damage to plaster and flooring.
The landlord’s priority is a clean, presentable home that can be let confidently. The letting agent needs a single point of contact, clear costs, access arrangements and evidence that the agreed work has been completed. That is where project coordination matters as much as the individual repairs.
Stage one: inspection, scope and practical priorities
The first visit should assess the property as a whole, not simply record the most obvious defects. A useful void inspection considers condition, safety, appearance, likely tenant use and the order in which work needs to happen.
For this example, the inspection identifies five connected work areas: plumbing repairs, bathroom improvements, joinery repairs, external maintenance and internal redecoration. Photographs are taken to support the quotation and give the landlord a record of the starting condition.
The radiator staining is traced to a minor pipework leak. The affected area is allowed to dry following the repair, then made good before painting. The toilet fill valve and bath silicone are addressed in the same bathroom visit. Grouping related work helps avoid repeated appointments and reduces the risk of one trade undoing another trade’s finished work.
The quotation separates essential repairs from optional improvements. Essential items include stopping the leak, repairing the toilet, securing cupboard doors, replacing the fence panel and making good damaged surfaces. Optional items may include upgrading old handles, replacing a visibly worn worktop or fitting new flooring in additional rooms.
This distinction gives the landlord control. Where a property is in good basic condition, targeted repairs and decoration may be the sensible choice. Where recurring maintenance issues or poor presentation are affecting demand, investing more during the void can be better value than returning repeatedly during a tenancy.
Stage two: planning the order of work
A void refurbishment is rarely efficient when trades arrive independently without a programme. The work needs sequencing so that repairs are completed before finishing work starts, and materials are available when needed.
In this property, the rear fence repair is scheduled early because it does not affect internal access. Inside, the plumbing repair comes first, followed by drying and plaster repairs. The joinery work to the kitchen units is completed before decorating, as adjusting hinges and replacing fixings can mark surrounding walls. Bathroom sealing is carried out after cleaning and repairs, then allowed to cure without unnecessary use.
The hallway flooring is fitted after the heavier internal work has finished. This avoids paint splashes, plaster dust and unnecessary foot traffic on a newly laid surface. Small decisions like this can make a noticeable difference to the finished standard and reduce rework.
For letting agents and property managers, access is often the practical challenge. Keys may need collecting, contractors may need to work around inspections, and the landlord may be based elsewhere. An office-supported contractor can arrange bookings, coordinate access and keep a clear record of what has been authorised. Southdown Group Limited manages this process so customers do not have to chase separate trades or repeatedly explain the same job.
Stage three: completing repairs before decoration
The repair phase deals with the causes of deterioration, rather than simply improving appearance. In this example, the pipework leak is repaired and the affected wall is checked before any cosmetic work begins. The toilet repair removes an issue likely to result in a tenant call-out. Loose cupboard hinges are adjusted or replaced so doors close correctly and do not place further strain on the units.
In the bathroom, old silicone is removed and renewed where needed around the bath. This is a relatively modest task, but failed seals can allow water behind surfaces and lead to more costly damage. The damaged fence panel is replaced and surrounding fixings checked, leaving the garden boundary secure and presentable.
At this point, the property may still look untidy. That is normal. A well-managed refurbishment does not judge progress by how quickly paint appears on the walls. It first creates a sound base for the finishing work.
Stage four: making the property ready to market
Once repairs and making-good work are complete, decoration can transform the overall presentation. In this example, walls and ceilings are prepared, minor cracks are filled, and the property is redecorated in neutral, hard-wearing finishes appropriate for a rental home. Woodwork is refreshed where it is marked or chipped.
The objective is not to make every room look newly built. It is to provide a clean, consistent standard that photographs well, gives prospective tenants confidence and is practical to maintain. A carefully chosen neutral scheme also makes later touch-ups simpler when a tenancy ends.
The worn hallway flooring is then replaced with a durable option suited to a high-traffic entrance. Final cleaning follows the dusty trades and decorating work, not the other way around. Kitchen and bathroom areas receive particular attention because these rooms strongly influence both viewings and early tenant satisfaction.
A final walk-through checks that doors open and close properly, taps and toilets operate as intended, repaired areas are finished to an appropriate standard, and no avoidable snags remain. Completion photographs can then be issued to the landlord or agent alongside a clear record of the work completed.
What this void refurbishment achieves
The completed property is not simply cleaner. The known leak has been resolved, vulnerable bathroom sealing has been renewed, loose joinery has been repaired and the external boundary is in better condition. Decorating and flooring then provide the visual finish needed for marketing.
For the landlord, this approach helps protect the asset and reduces the chance of immediately inheriting issues that should have been resolved while the property was empty. For the letting agent, it creates a clearer workflow: one quotation, one coordinated programme, fewer separate appointments and an accountable record of completion.
The timescale will depend on the condition of the property, drying time, material availability and the scale of the work. A light void with minor repairs and decoration may move quickly. A property with water damage, extensive plastering, kitchen repairs or several rooms of flooring needs a longer and more carefully planned programme. Setting a realistic schedule at the outset is better than promising an unrealistic completion date.
When a larger refurbishment is the better option
A void period is often the best time to deal with improvements that would be disruptive during a tenancy. If a bathroom is tired but serviceable, a landlord may choose repairs and resealing to keep the property moving. If it has repeated leaks, damaged finishes and outdated fittings that are generating regular maintenance requests, a more complete bathroom improvement may be justified.
The same applies to kitchens, internal doors, damaged plaster and external repairs. The right decision depends on the property’s rental level, target tenant, condition and planned holding period. A sensible scope focuses first on defects, then on improvements that support reliable letting and reduce future administration.
A successful void is not about spending the most money. It is about using the empty period properly: inspect carefully, agree priorities, complete work in the right order and hand back a property that is ready for the next tenancy. With clear communication and coordinated trades, a potentially stressful gap between tenants becomes a controlled part of managing the property.